CREATE AN APP

CREATE AN APP IN MARKETING CLOUD 


DESIGN DASHBOARDS

Create a dashboard to visually display all tracking information. While it can be used in all kinds of different ways, its primary intention is to provide information at-a-glance, such as KPIs.

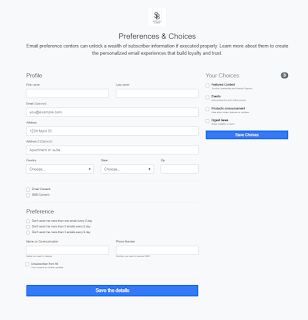
A dashboard usually sits on cloud page and receives information from data extensions. In many cases it’s configurable, allowing you the ability to choose which data you want to see and whether you want to include charts or graphs to visualize the numbers.


BENEFITS TO MARKETERS :

  • A visual representation of performance, such as with charts and graphs

  • The ability to identify the trends 

  • An easy way of measuring efficiency

  • The means to generate detailed reports with a single click


HOW TO DESIGN THE DASHBOARD :


1. Setup an automation with SQL activities that would capture from data views and stores into corresponding data extensions.

You can create addition data extensions to store KPIs based on Campaigns.

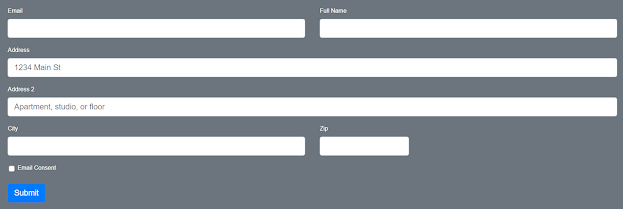
2. Create a landing page with multiple code snippets with HTML content to display KPIs. Design html code snippets to capture all relevant use cases described above.

Once the designs are finalized and approved with all features, publish the cloud page.

Point to consider, when you publish the cloud page, its publicly accessible, if the URL is known to the outside world. So, you need to secure your cloud page from outsiders.

Enable Security features in Marketing cloud pages:

1. Add the below meta tag : 

<meta name="ROBOTS" content="NOINDEX, NOFOLLOW">

2. Add the below SSJS Script to validate the origin :

<script runat='server'>
Platform.Load('core', '1.1.1');
var referer = Platform.Request.ReferrerURL;
var regex =/^(https:\/\/(.*\.)?((mc.domain)\.com))($|\/)/g;
var match = referer.match(regex);
var origin = (match.length > 0) ? match[1] : null;
</script>

3. Add Re-Captcha :

https://www.google.com/recaptcha/about/

<script runat="server">
    Platform.Load("core", "1.1.1");
    try {

        var g_recaptcha_response = Request.GetFormField("g-recaptcha-response");
        var secret = "{{ YOUR SECRET KEY }}";
        var payload = "secret=" + secret + "&response=" + g_recaptcha_response;
        var contentType = "application/x-www-form-urlencoded";
        var endpoint = "https://www.google.com/recaptcha/api/siteverify";
        var req = HTTP.Post(endpoint, contentType, payload);

        if (req.StatusCode == 200) {

            var resp = Platform.Function.ParseJSON(String(req.Response));

            if (!resp.success) throw "Wrong reCAPTCHA";

        } else {
            throw "reCAPTCHA API error";
        }
        /// DO SOMETHING
        Write(Stringify(resp));
    } catch (error) {
        Write(Stringify({ status: "Error", message: error }));
    }
</script>

HOW TO CREATE INSTALL PACKAGE :

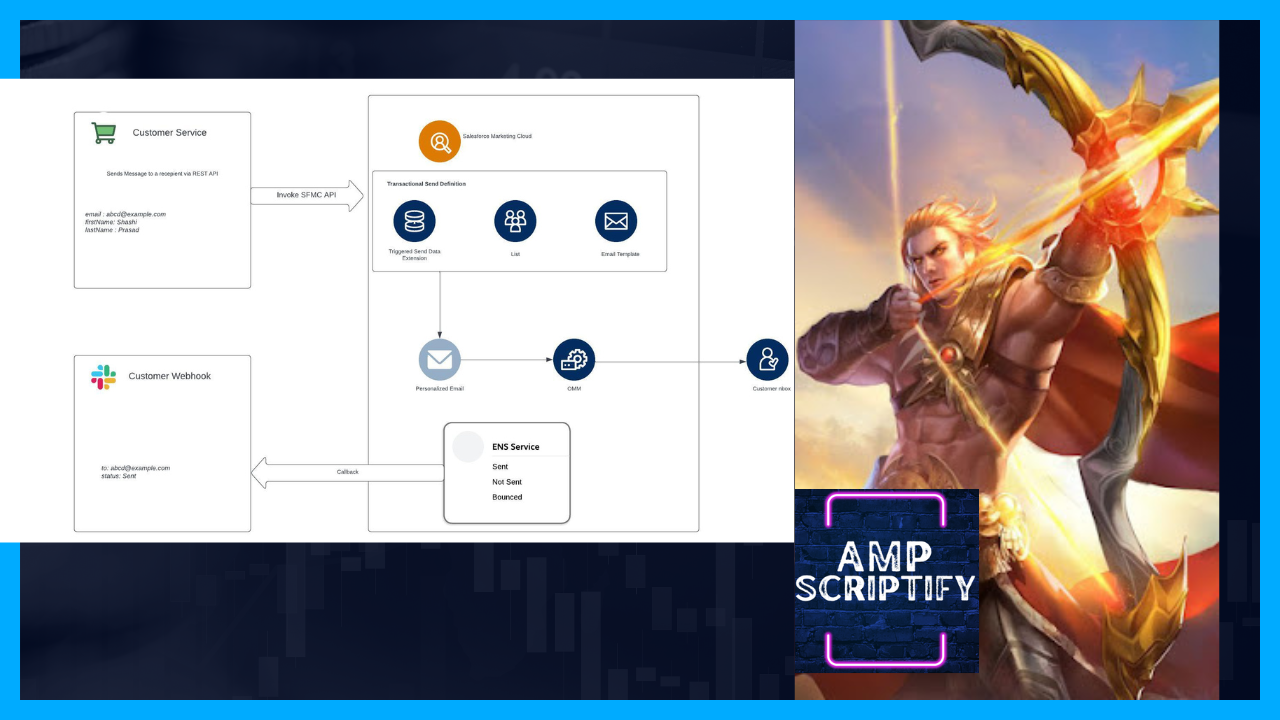
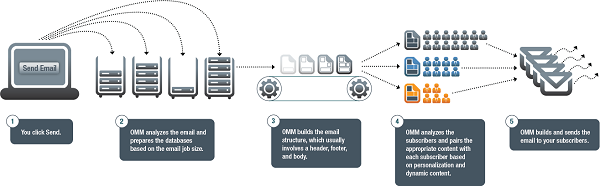
For a legacy package, Marketing Cloud posts a JSON Web Token (JWT) to your externally hosted app so that it can acquire access tokens on behalf of logged-in users. After you know the hosted endpoint for your app, you must register the endpoint in a Marketing Cloud installed package.

1. Create installed package

2. Add component 

3. Enter App Name and Description

4. Enter Dashboards' hosted cloud page URL for both Log-In and Log-Out

5. From Access tab you can allow access to selected Users

https://developer.salesforce.com/docs/marketing/marketing-cloud/guide/install-packages.html


Comments


Knowledge Article

Most Viewed

CLOUD PAGE ENABLEMENT - PART 1

EMAIL NOT SENT IN JOURNEY BUILDER

CONSIDERATIONS FOR JOURNEY BUILDER

Journey Builder REST API Documentation

Preference Center Demystified

Popular Posts

CLOUD PAGE ENABLEMENT - PART 1

EMAIL NOT SENT IN JOURNEY BUILDER

CONSIDERATIONS FOR JOURNEY BUILDER

Journey Builder REST API Documentation

Preference Center Demystified

SEND LOG EANBLEMENT

Share with Friends

Disclaimer:

The information provided on this technical blog is for general informational purposes only. As a SFMC (Salesforce Marketing Cloud) Technical Architect, I strive to offer accurate and up-to-date content related to SFMC and its associated technologies. However, please note that technology is constantly evolving, and the information provided may become outdated or inaccurate over time.

The content published on this blog represents my personal views and experiences as a SFMC Technical Architect and does not necessarily reflect the official views or opinions of any organization or employer I may be affiliated with.

While I make every effort to ensure the accuracy and reliability of the information presented, I cannot guarantee its completeness, suitability, or applicability to your specific circumstances. Therefore, it is essential to verify any information provided and make your own independent assessments or seek professional advice if needed.

Furthermore, any actions taken based on the information provided on this blog are at your own risk. I shall not be held liable for any damages, losses, or inconveniences arising from the use of the information presented here.

Please keep in mind that SFMC and its associated technologies are complex and require technical expertise for proper implementation and management. It is recommended to consult with qualified professionals or official SFMC documentation for comprehensive guidance.

Finally, please note that any product or company names mentioned on this blog are trademarks or registered trademarks of their respective owners. The mention of these trademarks or registered trademarks does not imply any endorsement or affiliation with the blog.

By accessing and using this blog, you agree to the terms of this disclaimer. If you do not agree with any part of this disclaimer, please refrain from using this blog.