JOURNEY BUILDER API ALLOWS YOU TO PROGRAMMATICALLY ACCESS AND INTERACT WITH JOURNEY BUILDER FUNCTIONALIITES.
STEP BY STEP GUIDE TO TRIGGER JOURNEY BUILDER API :
STEP 1 : CREATE AN INSTALL PACKAGE
Create an installed package in your marketing cloud account to create API integration, click here to read more.
Give package name and description
Choose API integration as Component
Select Server-to-Server as your integration type
Choose your scope for the integration and save.
STEP 2 : TEST YOUR INTEGRATION
Install postman and test your integration, to install postman click here.
Request SFMC token :
API - https://{{et_subdomain}}.auth.marketingcloudapis.com/v2/token
Body -
{
"grant_type": "client_credentials",
"client_id": "{{et_clientId}}",
"client_secret": "{{et_clientSecret}}",
"account_id": "{{et_mid}}"
}
From the installed package summary, update your Authentication base URI and update your body with Client Id, Secret and MID (optional).
STEP 3 : CREATE A JAVASCRIPT CODE RESOURCE
In Marketing Cloud, you can also create a code resource or content block and add the below code snippet for generating access token
<script runat="server"language="javascript">
Platform.Load("core", "1");
var MemberID = Platform.Recipient.GetAttributeValue('memberid');
var ClientId = get_config[0]["Client_ID"];
var ClientSecret= get_config[0]["Client_Secret"];
varurl = 'domain/v2/token';
var ContentType = 'application/json';
var payload = {
"client_id": ClientId,
"client_secret": ClientSecret,
"grant_type": "client_credentials"
};
try{
var accessTokenResult = HTTP.Post(url, ContentType, Stringify(payload));
var statusCode = accessTokenResult["StatusCode"];
var response = accessTokenResult["Response"][0];
var accessToken = Platform.Function.ParseJSON(response).access_token;
Variable.SetValue("@accessToken",accessToken);
}
catch(e)
{
Write(e.message);
}
</script>
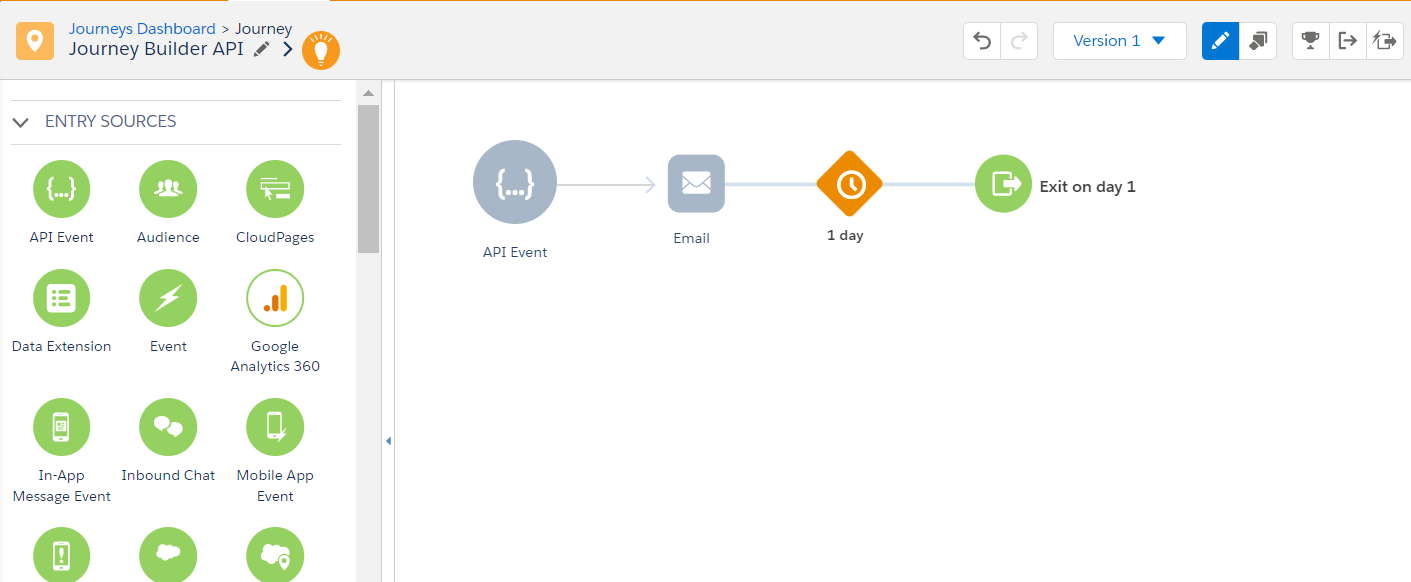
STEP 4 : CREATE A MULTI-STEP JOURNEY WITH API EVENT SOURCE
Drag and Drop API Event entry source into your canvas
Click on the API Event activity and create a new API Event , while creating a new event API you should also build a sendable data extensions for the Journey, select the sendable data extension and save it.
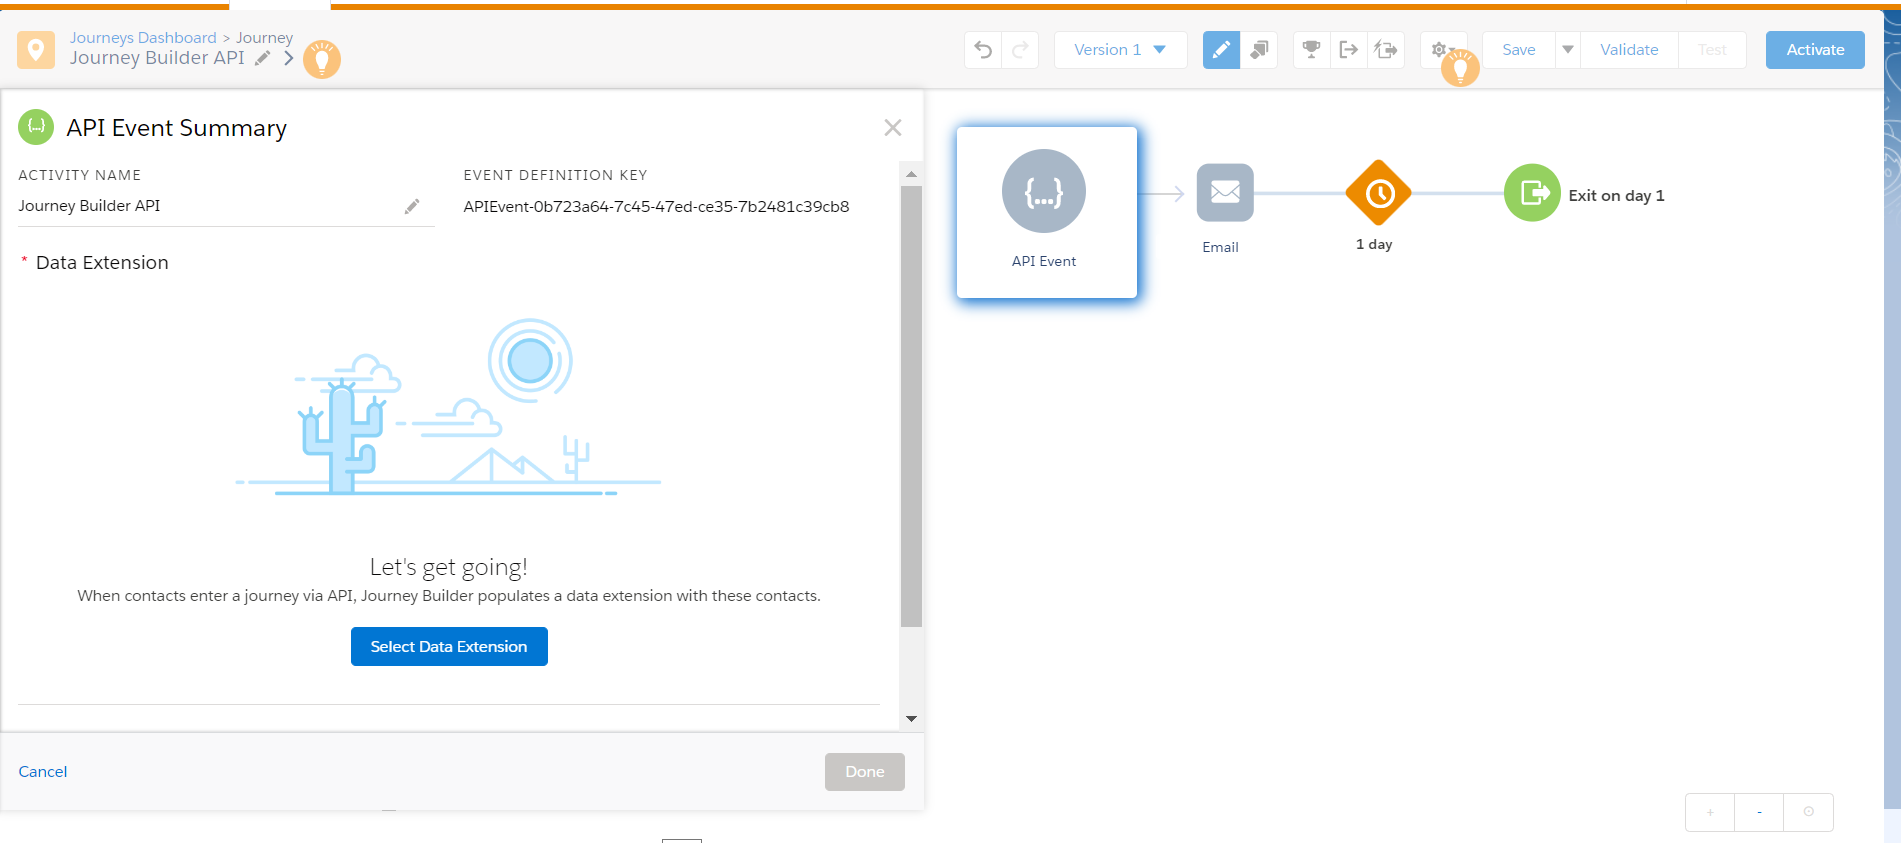
Configure your journey, validate and activate it. Once Activated copy the event definition key, you may store client Id, secret, AUTH, REST and SOAP API into a data extension.
STEP 5 : Validate you configuration via POSTMAN
Fire Entry Event :
URI - https://{{et_subdomain}}.rest.marketingcloudapis.com/interaction/v1/events
CLOUD PAGE ENABLEMENT - PART 1 CREATE A CLOUD PAGE IN MARKETING CLOUD USE CASE : Create a landing page in marketing cloud to collect consent from subscribers. Step 1: Create a landing page and publish it [no coding required] Step 2: Build a form control using bootstrap <form class = "row g-3" action = "https://tenantEndpoint/ConsentCollection" method = "Post" > </form> Update your form "action" attribute value with your cloud page URL. Method attribute "Post" Add form controls To collect email, add the below form control <div class = "col-md-6" > <label for = "inputEmail4" class = "form-label" > Email </label> <input type = "email" class = "form-control" id = "inputEmail4" name = "inputEmail4" value = "%%=v(@inputEmail4)=%%" required %% = v(@disabled) = %% &
TROUBLESHOOTING JOURNEY SENDS First step towards troubleshooting in SFMC is to install Query Studio from AppExchange. https://appexchange.salesforce.com/appxListingDetail?listingId=a0N3A00000FP3yFUAT Once you have access to Query studio you can write SQL queries and troubleshoot the issues quickly. If you are building a complex queries for a use case, you can write and execute the queries to see if it returns the desired output. Once, you are satisfied with your query you can save and add it to query activity. You can also save the output into a data extension if required, by default query studio stores the output into a data extension under the folder QueryStudioResults. If you have to execute another SQL with the output of the previous result, you can reference the Data Extensions and apply it in your FROM statement. FAQ : 1. How to find out who all did not receive email during journey send ? Best practice is to enable send logging for your account. This will help a-lot during troubl
CONSIDERATIONS FOR JOURNEY BUILDER WHAT HAPPENS WHEN YOU SEND AN EMAIL OUTBOUND MAIL MANAGEMENT GETS INVOKED BY MARKETING CLOUD , OMM IS NOT IN OUR CONTROL BUT LETS GO THROUGH BEHIND THE SCENE ACTIONS. 1. OOM PREPARES DATABASE FOR THE JOBS, OOM ANALYZES THE EMAIL, WHETHER IT'S A TEMPLATE BASED EMAIL OR HTML, WHETHER EMAILS CONTAINS PERSONALIZATIONS OR DYANMIC CONTNETS. 2. OOM STRUCTURES THE EMAIL BASED ON HEADER , BODY AND FOOTER. OOM RETRIEVES THE SUBJECT LINE , BODY CONTENT , AMPSCRIPT IN THE EMAIL AND INTERPRETS THE AMPSCRIPT AND RETIRVES IMAGES. 3. BASED ON THE DATABASE AND STRUCUTRE MAINATAINED BY THE OOM, IT DETERMINES THE CONTENT FOR THE SUBSCRIBERS AND PROCESSES TO MAINTAIN THE PLACEHOLDERS FOR EACH SUBSCRIBERS. 4. OOM HAS PLACED THE PROCESSES IN THE QUEUE, OOM BUNDLES EMAILS IN 500 BATCHES AND SEND TO SUBSCRIBERS INBOX. NOW WE HAVE THE BACKGROUD , WHAT ARE THE CONSIDERATIONS FOR BUILDING A JOURNEY JOURNEY PERFORMANCE ARE BASED ON : 1. DATA MODEL 2. FILTERS 3. JOURN
Journey Builder REST API Documentation Home Page Journey Builder REST API Documentation Introduction The Journey Builder REST API allows you to programmatically interact with the Journey Builder feature of Salesforce Marketing Cloud. With this API, you can create, update, and manage customer journeys, as well as perform various operations related to contacts and interactions within those journeys. This document provides detailed information on how to use the Journey Builder REST API to integrate and automate your marketing workflows. Base URL The base URL for accessing the Journey Builder REST API is:
Preference Center Demistifier Home Page Preference Center Demystified Email preference centers can unlock a wealth of subscriber information if executed properly. Learn more about them to create the personalized email experiences that build loyalty and trust.
SEND LOG EANBLEMENT STEP BY STEP GUIDE HOW TO ENABLE SEND LOGGING IN SALESFORCE MARKETING CLOUD STEP 1 : CREATE SEND LOG DATA EXTENSION Create a data extension for Send Log utilizing send log template. You can create similar Send log for SMS, Push etc., Default attributes for Send Log Add custom attributes to send log, custom attributes will increase you query optimization and troubleshooting If you have Google Analytics enabled you can add utm_campaign and utm_source attributes as well. Best Practice would be to archive send log on a monthly basis and set the retention policy to 6 months. STEP 2 : CREATE CODE SNIPPET TO ADD CUSTOM ATRRIBUTES TO SEND LOG Default send log attributes gets added to send log by default as it picks from system personalization string Email personalization strings can be found in email tool bar: Profile and System Attribute Create a code snippet Write an AmpScript block to add custom attributes to Send Log data extension %
The information provided on this technical blog is for general informational purposes only. As a SFMC (Salesforce Marketing Cloud) Technical Architect, I strive to offer accurate and up-to-date content related to SFMC and its associated technologies. However, please note that technology is constantly evolving, and the information provided may become outdated or inaccurate over time.
The content published on this blog represents my personal views and experiences as a SFMC Technical Architect and does not necessarily reflect the official views or opinions of any organization or employer I may be affiliated with.
While I make every effort to ensure the accuracy and reliability of the information presented, I cannot guarantee its completeness, suitability, or applicability to your specific circumstances. Therefore, it is essential to verify any information provided and make your own independent assessments or seek professional advice if needed.
Furthermore, any actions taken based on the information provided on this blog are at your own risk. I shall not be held liable for any damages, losses, or inconveniences arising from the use of the information presented here.
Please keep in mind that SFMC and its associated technologies are complex and require technical expertise for proper implementation and management. It is recommended to consult with qualified professionals or official SFMC documentation for comprehensive guidance.
Finally, please note that any product or company names mentioned on this blog are trademarks or registered trademarks of their respective owners. The mention of these trademarks or registered trademarks does not imply any endorsement or affiliation with the blog.
By accessing and using this blog, you agree to the terms of this disclaimer. If you do not agree with any part of this disclaimer, please refrain from using this blog.
Comments
Post a Comment